Updated on June 5, 2015
日本語手順書をダウンロード

The Mac has many different tools to automate and streamline tasks for you. One of my favorite is something called a “Folder Action”. It’s a special type of AppleScript and I’ve created this one which works with Evernote to demonstrate the concept.
Evernote Import Folder
This post will walk you through how to create a special folder which helps you organize files as you import them into Evernote. Whenever you drop or save files into it, a window pops up that allows you to add tags and to direct them into a specific notebook. Once those files have been sent to Evernote, the originals are silently moved to the Trash.
Cool, right?
Usage
I use this workflow primarily in two ways: Scanning paper documents with my ScanSnap — and as a “Virtual Hard Drive” to save items directly into Evernote.
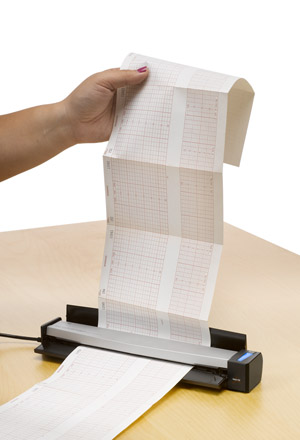
The ScanSnap Series of Document Scanners are currently my favorite devices for ordinary people to scan in all of their paper documents. They’re easy, reliable, and fast! The included ScanSnap software can be set up to allow direct scanning to Evernote, but it leaves behind a copy of the original… which causes an accumulation of PDF files very quickly. By using this “Evernote Dropbox Folder”, I can keep my hard drive clear of unneeded copies once they’re in Evernote.
I can also use the folder as a place to save documents from any program quickly into Evernote. Getting a copy into Evernote is now just as simple as selecting “Save As…” and pointing the file into your automated Evernote folder. I’ve also added the folder to my Finder sidebar so I can also easily drag in the files I want to archive.
In both cases, the included tagging and notebook selection window lets me organize things on the way into Evernote — which helps me to not be so lazy about keeping things tidy! 😉
Installation
Here’s how to set things up, step-by-step:
- Download and extract this ZIP file:
Download Folder Action Files
- (OPTIONAL) If you’d like to customize the way the script operates, you can open the script in your favorite AppleScript Editor and read the instructions inside to do things like set default tags, turn the tagging dialog box off, etc.
- Copy the included Folder Action Script to the /Library/Scripts/Folder Action Scripts directory on your Hard Drive. (You’ll probably need to Authenticate as an Admin to do so)
- Create a Folder on your Desktop to serve as your “Evernote Dropbox”. Personally, I call mine “@EVERNOTE” — but you can call it whatever you like.
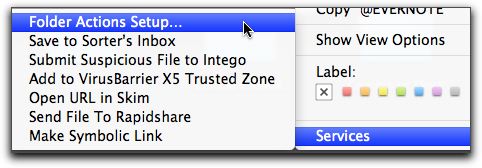
- Activate the Folder Action by Control-Clicking on this folder (a.k.a., “Right Clicking”) and selecting “Folder Action Setup” from the “Services” menu:
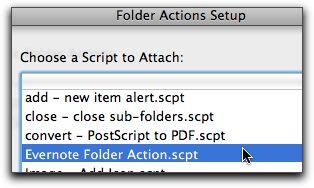
- Select the Evernote Script from the Folder Action Setup menu and select the Activate box, if present:
Fit and Finish
The Folder should be working at this point, but I like to do a couple of other things to make it a little more useful — and to remind me to use it!
First, I change the icon of the folder so it stands out on the Desktop. I’ve hacked together an icon and I’ve included it in the ZIP file for your convenience.
- To change your icon from the standard folder graphic, open the image file that I included in the ZIP file and open it with Preview. Press Command-A (⌘A) to select the whole image and then press Command-C (⌘C) to copy it to the Clipboard.
- To change to the new image, highlight your new Evernote Desktop folder and select “Get Info” — either from the Finder Menu=>File Menu or by pressing Command-I (⌘I). A window will open with information about the folder… and at the top will be the graphic for the folder. Click on it and you’ll see a subtle blue highlighting around the image. This means that it’s ready for our new image.
- Press Command-V (⌘V) to paste the image and — voila — you’ve got yourself a custom icon!

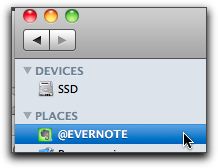
- As I mentioned, I also like to create a shortcut in the Finder Sidebar. To create it, just drag-and-drop the Folder into Finder’s “Places” to add a shortcut. Now whenever you are saving a document, you can quickly select Evernote as the location to save your file!
That’s it! Let me know how it works for you in the comments below… and if something seems broken, please submit your Bug Reports here!
If you liked this project, click here to let me know!
 In case you missed yesterday’s launch of the Giveaway for Mac Users, here are a few new prizes which might catch your eye…


